 how-to
Getting Professional Results From Rough Sketches
Table of Contents
- What You'll Need Before You Start
- Step 1: Define the Job Your Rough Sketch Has to Do
- Step 2: Build Construction Lines, Shapes, and Proportions
- Step 3: Sketch Fast, Then Refine With Time-Boxing and Iteration
- Step 4: Converting Hand Sketches to Vector Files
- Step 5: How to Communicate Design Ideas to a Fabricator
- Common Mistakes That Keep Rough Sketches From Looking Professional
- Conclusion
- Frequently Asked Questions
Last Updated: September 21, 2026
What You'll Need Before You Start
Getting professional results from rough sketches starts with the right setup, not the right talent. Most people assume clean output comes from steady hands. It doesn't. It comes from process.
Rough sketches are the loose, fast drawings you make to work out an idea before committing to a finished piece. They are meant to be messy. The skill is in what you do next.
Here's what to have on hand:
- Pencil and paper, or a tablet with a stylus
- A scanner or phone camera for digitizing
- Vector software like Inkscape or Adobe Illustrator
- Reference images for proportions and anatomy
- A ruler or calipers for scale checks
At VanderLab, we work from sketches, photos, and rough ideas every week. The sketches that turn into the best finished pieces are rarely the prettiest ones. They're the clearest ones.
Step 1: Define the Job Your Rough Sketch Has to Do
A rough sketch has one job: to answer a question. Which shape works? Where does the logo sit? How wide is the sign?
If your sketch isn't answering a specific question, it's just doodling.
Rough Draft vs. Final Illustration: Know Which One You're Holding
A rough draft is a thinking tool. A final illustration is a communication tool.
Keep them separate:
- Rough draft: fast, loose, disposable, made to explore
- Final illustration: clean, deliberate, measured, made to present
Once the rough answers its question, stop. Move on.
Step 2: Build Construction Lines, Shapes, and Proportions
Construction lines are light guide marks that hold your drawing together before any detail goes in. They're the scaffolding. You erase them later.
- Block the overall size first
- Mark the center line
- Compare widths against your reference
- Fix proportion problems now, not later
Step 3: Sketch Fast, Then Refine With Time-Boxing and Iteration
The iterative process looks like this:
- Ten minutes, five thumbnails
- Pick the two strongest
- Ten more minutes, refine those two
- Pick one and commit
Then let go of the rest. This is the psychology part nobody talks about. Clinging to every rough draft stalls the project. The rough was never the point.
Step 4: Converting Hand Sketches to Vector Files
Converting hand sketches to vector files means turning a scanned drawing into clean, scalable line art. Vector files hold their quality at any size, which matters for engraving, cutting, and printing. A raster scan of a pencil sketch will pixelate the moment you scale it up; a vector trace stays sharp whether the finished piece is a two-inch keepsake or a four-foot address sign.
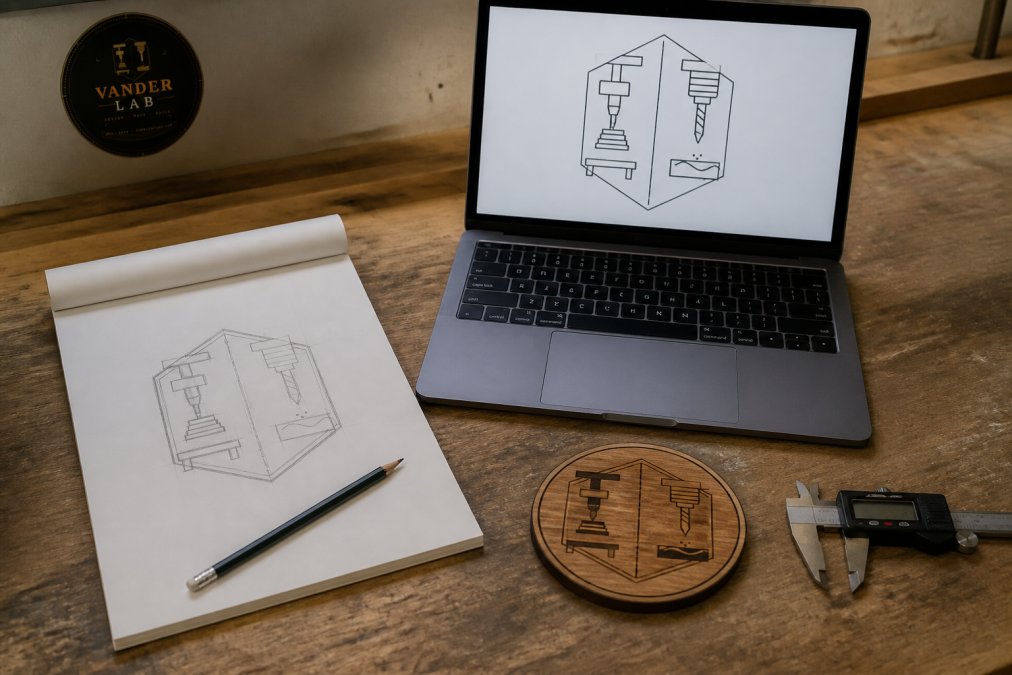
Here's the workflow that works:
- Scan or photograph the sketch at high resolution, 300 DPI minimum, 600 DPI if the drawing has fine detail
- Open it in your vector software as a locked background layer
- Set that layer's opacity to roughly 40-50% so your trace sits visibly on top
- Trace the clean lines with the pen tool, placing nodes at curves and corners only
- Adjust brush settings and node placement
- Hide the background layer and check the result at actual size
Layer Management Is the Whole Game
Most messy conversions aren't drawing problems, they're layer problems. A common pattern among people who get clean results is a four-layer stack:
- Bottom layer: the locked scan, at reduced opacity
- Middle layer: construction marks and guide lines, kept on their own layer so you can toggle them off
- Top layer: your clean line art
- Reference layer: notes, dimensions, and callouts, hidden before export
Where AI-Assisted Cleanup Fits
Most guides stop at manual tracing. That's the slow path, and it's no longer the only one. AI-assisted refinement tools can take a rough scan and produce a first-pass trace in seconds. The output is rarely final, but it's a starting point that saves the tedious part.
The workflow that actually helps:
- Run the rough sketch through an AI trace to get a base vector
- Import that vector into your software on its own layer
- Manually fix node placement, smooth curves, and remove artifacts the AI guessed wrong on
- Compare against the original scan at full opacity to catch drift
Step 5: How to Communicate Design Ideas to a Fabricator
How you communicate design ideas to a fabricator decides whether your part comes back right. A fab shop can't read your mind, and a pretty sketch alone won't cut it. The sketch shows intent; the handoff shows specification. Most rework traces back to a gap between those two.
Give them four things:
- Clear dimensions with units labeled
- Material preference, if you have one
- Where the piece will be used
- Which details matter most
Tolerances, in Plain Terms
A tolerance is how much a measurement is allowed to vary and still be acceptable. A hole specified at a quarter inch with a loose tolerance can be drilled fast. The same hole with a tight tolerance may need a different tool, a slower pass, or a test cut first. When you mark tolerances, you're telling the shop where precision matters and where it doesn't, which is the difference between a part that fits and a part that comes back for a second run.
Material Trade-Offs Worth Knowing
Materials behave differently, and the choice affects both the look and the durability of the finished piece:
- PLA, easy to print, holds fine detail, but softens in heat. Fine for indoor décor and display pieces.
- PETG, tougher and more heat-resistant than PLA, with a slightly less crisp finish. A good middle ground for functional parts.
- ABS, strong and heat-tolerant, but trickier to print and prone to warping without the right setup.
- TPU, flexible and impact-resistant. Right for parts that need to bend or absorb a hit.
- Wood, warm, workable, and ideal for signage and keepsakes. Grain direction affects how cuts and engravings read.
- Metals, durable and precise, but slower to machine and less forgiving of a sketch that wasn't fully resolved.
The Psychology of Letting the Rough Go
The handoff is also where a lot of people stall. Handing over a rough sketch feels like handing over something unfinished, and the instinct is to keep polishing before anyone sees it. That instinct costs time. A fabricator can work from a clear rough with good dimensions far faster than from a beautiful rendering with none. The rough was never the deliverable, it was the question.
A rendering with no dimensions is a wish. A rough sketch with labeled tolerances is a build. Send the second one.
Common Mistakes That Keep Rough Sketches From Looking Professional
The gap between amateur and professional output usually comes down to a handful of repeatable errors.
| Mistake | What It Costs You | The Fix |
|---|---|---|
| Polishing too early | Hours lost on the wrong idea | Time-box your roughs first |
| Skipping construction lines | Wonky proportions | Block big shapes before detail |
| One sketch only | Settling for a weak option | Sketch five, pick the best |
| Messy file layers | Endless cleanup | Separate scan, line art, and notes |
| Vague fabricator notes | Wrong parts, rework | Label units and critical dimensions |
A few more that catch people out:
- Tracing a low-resolution scan, which produces jagged line art
- Ignoring visual hierarchy, so every element shouts at once
- Forgetting to check the final file at actual size
Conclusion
The hardest part of this whole process isn't drawing well. It's knowing when a rough sketch has done its job and it's time to move on.
Adobe's guide to vector graphics and file formats
Inkscape official documentation for tracing bitmaps
Frequently Asked Questions
What are the limitations of using rough sketches for custom manufacturing?
A rough sketch can't carry dimensions, tolerances, or material callouts, so it can't be cut or printed as-is. It also leaves proportion and scale open to interpretation, which is where mismatched parts come from. Treat the sketch as a concept and the CAD file as the instruction sheet. If you can't produce a CAD file, a fabricator can work from your sketch and notes, but expect a quote conversation about dimensions before anything gets machined.
Can a home fabrication lab work from hand-drawn sketches?
Yes. Plenty of small shops, including ours in Mebane, take a sketch, photo, or napkin drawing and turn it into a print- or machine-ready file. The sketch needs to show overall size, how the piece will be used, and any hard points like hole spacing or mounting. From there, the design gets rebuilt in CAD, checked for wall thickness and fit, and sent back to you for approval before cutting or printing begins.
How do I prepare a rough sketch for CNC routing?
Draw the part at a known scale or write the overall dimensions directly on the page, then mark hole centers, edge distances, and which face is the front. Note the material and thickness you want. Avoid shading and texture; those don't survive the jump to a cut file. For converting hand sketches to vector files, clean closed outlines matter more than pretty linework, since open paths and stray marks are what stall a router job.
What file formats are needed to turn a drawing into a precision part?
For CNC routing, vector formats like DXF, SVG, or AI are standard, and a clean PDF can work as a reference. For 3D printing, STL, STEP, or 3MF are the usual formats. Send both the vector or model file and a dimensioned drawing if you have one. If all you have is a hand sketch, that's fine as a starting point, but the shop will redraw it, and you should review that redraw before production.