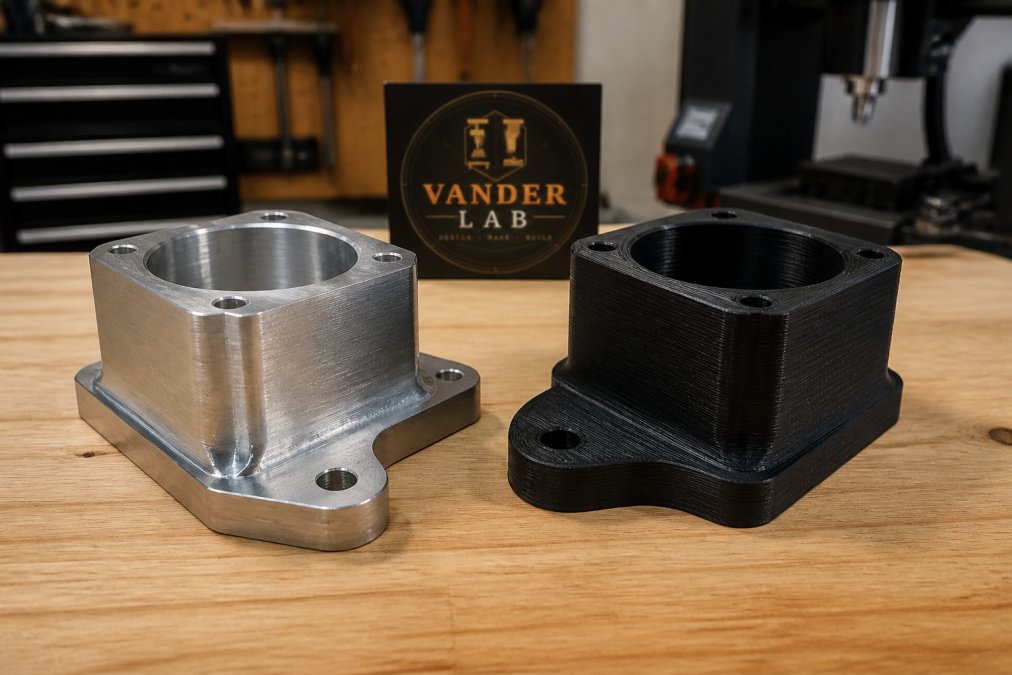
 comparison
CNC Machining vs 3D Printing for Prototypes: 2026 Guide
Table of Contents
- CNC vs 3D Printing for Prototypes: Which Should You Choose?
- Prototype Comparison at a Glance
- Dimensional Accuracy and Tolerances
- Material Selection and Mechanical Properties
- Cost, Speed, and Production Volume
- Surface Finish and How to Avoid Layer Lines in 3D Printing
- Which Method Fits Your Prototype?
- Frequently Asked Questions
Last Updated: September 8, 2026
CNC vs 3D Printing for Prototypes: Which Should You Choose?
Choosing between CNC machining vs 3D printing for prototypes comes down to one question: does your part need to perform like the final production piece, or does it need to prove the design works? CNC machining carves parts from solid blocks of material, while 3D printing for prototypes builds parts layer by layer from digital files. VanderLab offers both CNC machining and 3D printing services.
CNC machining removes material from a solid block, so the finished part inherits the strength of the original material. 3D printing for prototypes adds material only where needed, opening up geometric possibilities that machining cannot achieve. Neither approach wins outright. Below, we'll walk through tolerances, materials, cost, and surface finish so you can match the process to the phase of your project.
Prototype Comparison at a Glance
CNC machining is the subtractive manufacturing workhorse: it starts with a block of metal or plastic and cuts away everything that isn't your part. 3D printing for prototypes uses additive manufacturing, fusing material layer by layer until the geometry is complete.
| Factor | CNC Machining | 3D Printing for Prototypes |
|---|---|---|
| Process type | Subtractive (material removed) | Additive (material deposited) |
| Typical tolerances | Tight, often ±0.005 in. or better | Looser, varies by printer and material |
| Material strength | Matches solid stock properties | Weaker along layer lines (anisotropic) |
| Geometric complexity | Limited by tool access | Nearly unlimited complexity |
| Surface finish | Smooth, machine-ready | Visible layer lines, needs post-processing |
| Best for | Functional, production-grade parts | Form, fit, and early iteration models |
Dimensional Accuracy and Tolerances
CNC machining wins on dimensional accuracy, and it wins decisively. A well-calibrated CNC mill holds tolerances of ±0.005 inches or tighter, which is why machined parts are trusted for functional testing and assembly verification (engineering.com).
3D printing for prototypes struggles to match that precision. Fused deposition modeling printers typically hold tolerances around ±0.020 inches at best, and part orientation affects the result. For a snap-fit enclosure or a part that must mate with existing hardware, that difference is the difference between a prototype that works and one that only looks right.
Machining those tight tolerances requires rigid setup and careful fixturing. For beginners learning cnc machining tolerances, the practical rule is simple: specify the loosest tolerance your design actually needs, because every extra decimal place adds machining time and cost.
Material Selection and Mechanical Properties
Material choice often settles the debate before you even price the job. CNC machining works with the full catalog of engineering materials: aluminum, steel, brass, and production-grade plastics like ABS, nylon, and acetal. Because the part is cut from solid stock, its mechanical strength matches the material datasheet.
3D printing for prototypes offers thermoplastics like PLA, PETG, ABS, and TPU, plus resin options. These materials are fine for form and fit models, but they have anisotropic properties: parts are measurably weaker along the layer lines than across them.
If your prototype must survive functional testing, endure heat, or carry real load, machining is the safer bet. If you need to check ergonomics or iterate through several shape variations quickly, printed parts are more than adequate.
Cost, Speed, and Production Volume
Cost structures for the two processes could not be more different. 3D printing for prototypes shines at the low-volume end: minimal setup time, no tooling, and cost-per-part stays flat whether you print one piece or twenty.
CNC machining carries higher setup costs because programming tool paths and fixturing the stock takes skilled time. That upfront investment pays off as quantity grows, once the program is proven, each additional part is relatively quick to produce.
The Hidden Labor Cost That Skews Every Comparison
Most guides compare machine time and material cost, then stop. That misses the largest variable in real-world prototyping: post-processing labor.
3D printing post-processing labor:
- Support removal: FDM parts with overhangs need supports printed beneath them. Snapping or cutting those supports away takes 15-45 minutes per part, depending on complexity, and leaves scars that require sanding.
- Layer line finishing: A part that needs to look presentable for a client demo or paint finish requires sanding through progressively finer grits, typically 200, then 320, then 400. A fist-sized part can absorb 30-60 minutes of hand sanding.
- Surface sealing: Painted or vapor-smoothed surfaces add another cycle. Acetone vapor smoothing for ABS takes setup and safety precautions; epoxy or primer sealing adds drying time measured in hours, not minutes.
- Dimensional drift: Aggressive sanding removes material unevenly. A part that printed at ±0.020 in. tolerance can drift past ±0.030 in. by the time it is smooth, which matters if it must mate with another component.
CNC machining post-processing labor:
- Deburring: Machined edges come off the tool with sharp burrs, especially on aluminum and steel. Hand deburring with a file or scraper takes 5-15 minutes per part.
- Surface treatment: If the part needs anodizing or powder coating, that adds a vendor lead time of 3-5 business days. But the machined surface itself is ready for those processes without hand preparation.
- Inspection: Machined parts destined for functional testing typically get a quick dimensional check with calipers or a gauge. That takes minutes, not hours.
A common pattern in prototyping is that a printed part may cost less in raw material but more in total labor. For example, a bracket with a 4-hour print time and a 2-hour finishing process could be compared to the same bracket machined in 45 minutes with 10 minutes of deburring.
A Practical Cost Model for Your Project
To estimate which process fits your budget, work through these four questions:
- How many design revisions do you expect? Each printed revision costs only the material and print time. Each machined revision costs new programming and setup time. If you expect more than three revisions, printing early saves money.
- What is your labor worth? If you are doing the finishing yourself, your time is the hidden cost. If you are paying a shop, ask specifically about post-processing hours, many shops quote machine time separately from finishing labor.
- Does the part need to function? A printed part that fails under load costs you a full redesign cycle. A machined part that behaves like the production component saves that risk.
- What is the opportunity cost of waiting? A machined part that arrives in 3 days and works on the first test beats a printed part that arrives in 1 day but needs two more iterations to survive testing.
The real cost trap is post-processing labor. Printed parts rarely ship as-is: layer lines need sanding, support structures need removal, and surfaces may need sealing or painting. Machined parts come off the machine with a usable finish.
Surface Finish and How to Avoid Layer Lines in 3D Printing
Surface finish is where the visual difference becomes obvious. A machined part shows clean, uniform surfaces with visible but subtle tool marks, ready for painting, anodizing, or use as-is. A printed part shows layer lines.
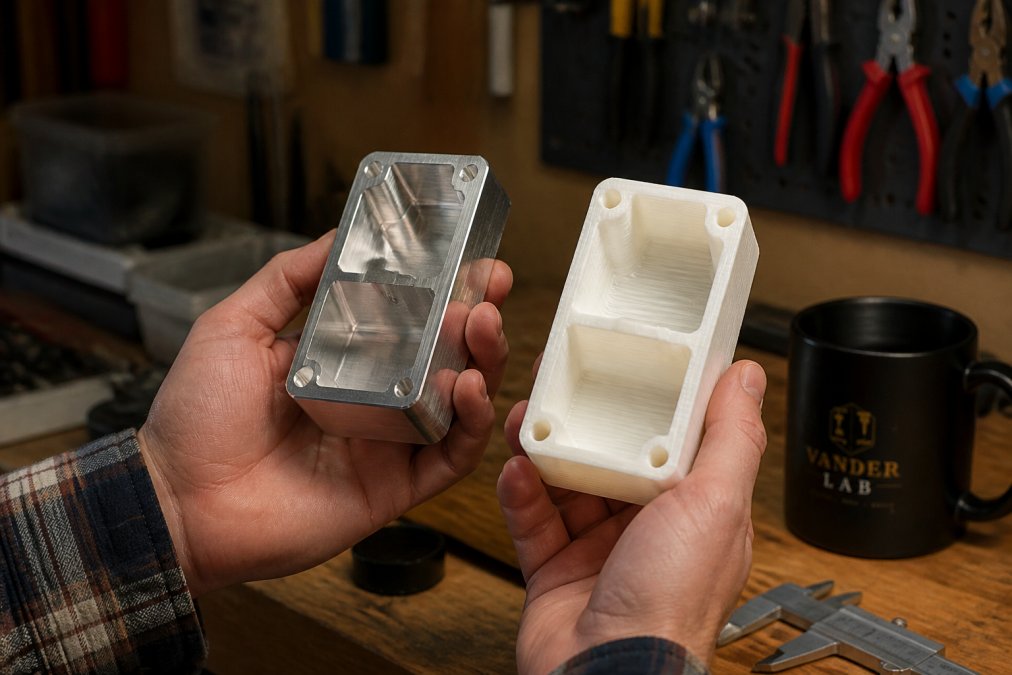
If you are printing prototypes and need a cleaner look, several strategies reduce or eliminate layer lines. Print at thinner layer heights, such as 0.12 mm instead of 0.20 mm. Orient the part so that curved or detailed faces are printed vertically rather than as shallow angles. Sand with progressively finer grits, starting around 200 and moving to 400 or higher.
The honest trade-off: post-processing adds hours of labor. A prototype that takes four hours to print might take another two to finish properly.
Which Method Fits Your Prototype?
The question is not which process is better; it is which process answers the question your prototype is asking. Below is a framework built around the four constraints that drive prototype decisions: budget, timeline, material requirements, and iteration count.
The Four-Question Decision Framework
Question 1: What do you need to learn from this prototype?
- If the answer is about shape, proportion, or ergonomics, 3D printing for prototypes is the right tool. Print it, hold it, look at it, and revise.
- If the answer is about performance, durability, or heat resistance, CNC machining is the only honest choice. A printed part will not tell you how the production part behaves.
- If the answer is about assembly fit, start with printing for a rough check, then switch to machining once the design is close to final.
Question 2: How many design revisions do you anticipate?
- More than three revisions: print early, machine late. Each printed revision costs hours; each machined revision costs days.
- One or two revisions: machining may be faster overall, especially if the part is simple and the programming is straightforward.
Question 3: What material must the prototype represent?
- Aluminum, steel, or engineering plastic like acetal or nylon: machine it. No printed material accurately represents the stiffness, thermal behavior, or wear characteristics of solid metal stock.
- ABS, PETG, or resin is acceptable for visual models: printing is fine.
Question 4: What is your timeline to a tested part?
- Same-day iteration: print.
- A tested, functional part within a week: machine.
A Hybrid Workflow That Most Articles Miss
The most effective prototyping strategy is not choosing one process, it is sequencing both.
Phase 1: Print for geometry. Start with 3D printing to explore the design space. Print multiple variations of the part to test ergonomics, visual appeal, and gross fit. At this stage, tolerances do not matter; learning does.
Phase 2: Machine for performance. Once the design is frozen, switch to CNC machining for the parts that must survive testing. The machined part inherits the strength of solid stock, holds tight tolerances, and behaves like the production component.
Phase 3: Print for bridge production. If you need 10-20 parts while production tooling is being made, printing can fill the gap, but only for non-functional applications like marketing samples or display models.
A concrete example: a custom enclosure with a complex curved exterior and precise mounting holes. Print the first iterations to refine the curve and check button placement. Once the design is locked, machine the final prototype from aluminum or acetal.
The Decision Matrix at a Glance
| Scenario | Recommended Process | Why |
|---|---|---|
| Early concept model, shape exploration | 3D printing | Fast, cheap, easy to revise |
| Fit check with loose tolerances | 3D printing | Good enough for gross alignment |
| Fit check with tight mating surfaces | CNC machining | Holds ±0.005 in. reliably |
| Functional testing under load | CNC machining | Material behaves like production |
| Heat or chemical exposure | CNC machining | Engineering plastics and metals required |
| Multiple design iterations (3+) | 3D printing first, then machine | Print to explore, machine to confirm |
| Small production run of final parts | CNC machining | Cost-competitive, production-grade durability |
| Client demo or marketing sample | 3D printing with post-processing | Visual quality is sufficient |
When the Answer Is "Both"
A hybrid workflow often makes the most sense. Print early iterations to nail down the geometry, then switch to machining once the design is frozen and you need parts that perform.
The deciding factor is always the same: what do you need to learn from this prototype? If the answer is about shape or fit, print it. If the answer is about performance or durability, machine it. If the answer is both, and it often is, sequence the two processes rather than choosing one. For projects that need both, or for guidance on turning a rough idea into a machined or printed part, CNC machining tolerances guidance from the engineering community offers useful reference data, and our team at VanderLab is glad to talk through your specific part. Request a custom quote through our contact page and we will help you pick the process, or the sequence, that fits your timeline and your budget. You can also browse our Ebay Shop to see examples of our finished work.
Frequently Asked Questions
Is 3D printing a good way to make prototypes?
Yes, for early-stage design. 3D printing for prototypes is fast and cost-effective, making it ideal for testing form, fit, and basic function. You can iterate through several versions in the time one machined part takes. The tradeoff is lower dimensional accuracy and mechanical strength compared to CNC. Choose 3D printing when speed and low cost per iteration matter more than tight tolerances or production-grade materials.
How do tolerances compare between CNC-machined parts and 3D-printed models?
CNC machining tolerances for beginners typically start around ±0.005 inches, while 3D printing holds roughly ±0.020 inches. That gap matters for moving parts, press fits, or anything that must mate with existing components. CNC machines cut from solid material, so they hold tighter tolerances and produce parts with predictable mechanical properties. For a prototype that must function exactly like the final part, CNC is the reliable choice.
Is 3D printing or CNC machining better for functional prototypes?
For functional prototypes that must survive real-world testing, CNC machining is the better choice. Machined parts use production-grade materials like aluminum, steel, or engineering plastics, so they behave like the final product. 3D printing works well for visual models or prototypes with complex internal geometry that CNC cannot reach. If the prototype needs to handle stress, heat, or repeated use, CNC machining for prototypes delivers the mechanical strength you need.
Which prototyping method is more cost-effective for small-batch production?
For small-batch production runs, CNC machining can be a cost-effective option. Once the setup is complete, each machined part is quick to produce with consistent quality. 3D printing has lower setup costs, which suits one-off prototypes, but the per-part cost can remain consistent, and material properties may vary. For functional parts in real materials, CNC can offer good value per part as quantities grow.