 ultimate-guide
Turnaround Time for Custom 3D Printed Parts
Table of Contents
- What Determines Turnaround Time for Custom 3D Printed Parts
- Standard vs. Express Lead Times
- Factors Affecting 3D Print Time
- 3D Printing Post-Processing Steps
- File Preparation and Its Impact on Speed
- Shipping and Logistics Considerations
- How to Optimize Your Order for Faster Delivery
- Conclusion
- Frequently Asked Questions
Last Updated: September 28, 2026
What Determines Turnaround Time for Custom 3D Printed Parts
Turnaround time for custom 3D printed parts isn't a fixed number. It depends on how your part is designed, what material you choose, how busy the fabrication lab is, and what happens after the printer finishes. Understanding these variables helps you plan realistic timelines and, more importantly, optimize your order to get parts faster.
Understanding what actually drives production speed helps you make smarter decisions about your next order.
The American Society for Testing and Materials (ASTM) standards for additive manufacturing define how industrial 3D printing is tested and validated, but what matters for your timeline is understanding the operational reality behind those standards. Lead time isn't just about how long the printer runs. It's about machine capacity, file preparation, material availability, post-processing bottlenecks, and shipping logistics all working together.
Standard vs. Express Lead Times
Lead times vary. Express options may compress timelines, but only when geometry is simple, materials are in stock, and post-processing is minimal.
Express service prioritizes your job in the queue and may dedicate a machine or run night shifts. If you don't need parts quickly, standard service may be more economical.
How Queue Position Actually Works
Express service changes when your job gets scheduled, not how fast it prints. At 100% capacity, no service tier can compress timelines.
Before committing to a deadline, ask your fabrication partner: "What percentage of your machines are booked right now?" A shop at 85% capacity can promise faster turnaround than one at 100%.
When Express Actually Makes Sense
Express services can be beneficial for simple prototypes with minimal post-processing and in-stock materials. It may be less suitable for larger batch orders, complex post-processing, or specialty materials.
Factors Affecting 3D Print Time
Part geometry, infill density, wall thickness, and layer height all control print duration. Finer layers (0.1mm) produce better quality but take longer than coarser settings (0.2mm).
Material selection directly impacts print speed. Research from Stratasys on FDM printing parameters shows that different thermoplastics have different optimal print speeds. Nylon prints slower than PLA. ABS requires higher temperatures and longer cooling times between layers. TPU (flexible material) demands even more patience because the printer must slow down to maintain part integrity.
Queue position determines when your job starts. Batch processing nests multiple parts on one build plate, maximizing throughput but extending individual lead times.
Part Geometry and Build Volume
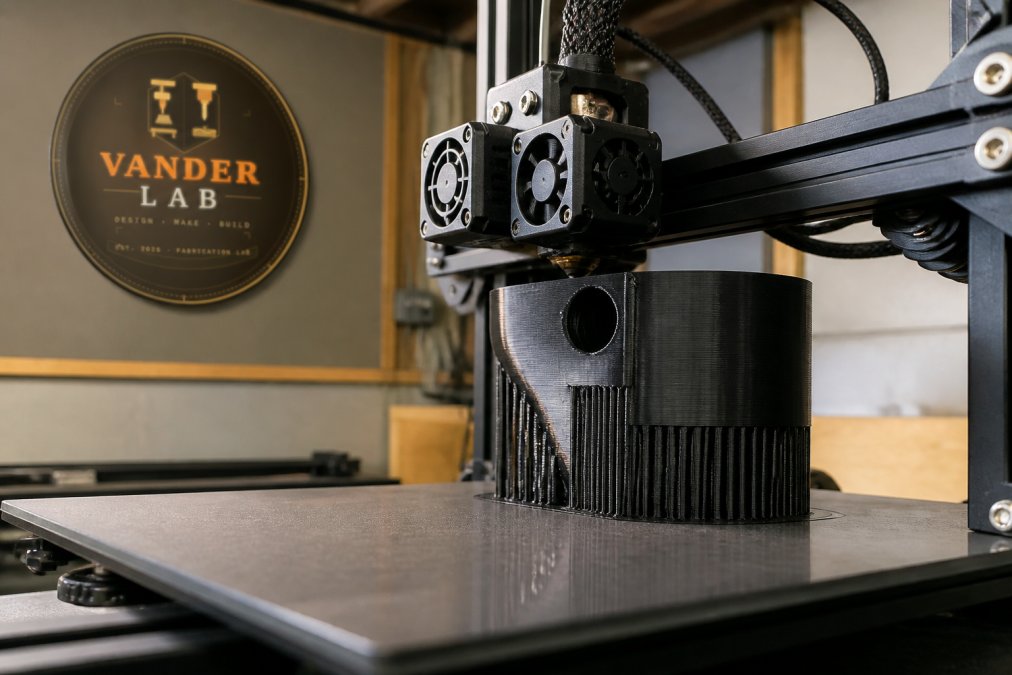
Parts with deep overhangs, thin walls, or complex channels require extensive support material, adding print and removal time.
Parts exceeding build volume must be split, printed separately, and assembled, adding time and labor.
Tight nesting speeds per-part turnaround; oddly-shaped parts waste build plate space and extend production time.
Material Selection and Print Settings
PLA prints fastest (low melting point, minimal shrinkage). PETG and ABS are slower (higher temperatures, careful cooling). Nylon is slowest (requires drying).
TPU demands slow speeds to prevent layer separation; carbon-filled nylon handles faster speeds but needs higher temperatures and preheat time.
Infill density scales print time directly.
3D Printing Post-Processing Steps
Post-processing often takes longer than printing itself.
Support removal requires manual cleanup and can take 30 minutes to several hours per part, especially for complex geometries.
PLA parts can be sanded smooth. Nylon or PETG parts may need chemical vapor smoothing (acetone exposure), which takes hours and requires ventilation.
TPU and flexible resin parts need heat treatment (4-8 hours) to reach full strength.
QA testing for functional parts (dimensional checks, stress tests) adds days to production.
File Preparation and Its Impact on Speed
A clean CAD file with proper wall thickness and no geometry errors goes straight to the queue. Problematic files are flagged, returned for revision, and delayed by days.
How Automated File Validation Works
Automated validation checks for: wall thickness violations (< 0.8-1.5 mm), non-manifold geometry, enclosed cavities without drainage, extreme overhangs (> 45°), and file format/scale errors.
Failed validation requires redesign or manual review, both add delay.
Manual Review and Its Timeline Impact
If your file is complex or requires custom material requests, automated validation passes it to a human designer for manual review. This step typically takes 24-48 hours. The designer checks:
- Whether the geometry is actually printable despite flagged warnings
- Whether support structures can be optimized to reduce print time
- Whether infill density and wall thickness are appropriate for the intended use
- Whether the part can be nested with other jobs to improve efficiency
Manual review adds time but can also optimize your order. A skilled designer might suggest geometry simplifications that cut print time by 20-30% without compromising function. However, if the designer identifies issues that require redesign, you're back in revision cycle, which adds 1-3 days depending on how quickly you can iterate.
Common File Issues That Extend Lead Time
Walls thinner than minimum printable thickness (0.8-1.5 mm depending on material): The part fails automated validation and is returned. You must thicken the walls and resubmit. This adds 24 hours minimum.
Enclosed cavities or internal voids: Resin-based printing leaves uncured material inside sealed spaces. Powder-based printing leaves powder trapped inside. Both render the part unusable. The file is rejected, and you must either add drainage holes or redesign the geometry. This adds 1-2 days.
Missing or incomplete geometry: Surfaces that don't connect, faces with gaps, or incomplete shells are flagged as non-manifold. The slicing software cannot generate tool paths for incomplete geometry. The file is returned, and you must repair it in CAD. This adds 24 hours.
Overly complex support structures: A part with deep overhangs, thin walls, or intricate internal channels requires extensive support material. The slicing software generates supports automatically, but complex geometry can require manual support placement. That manual work adds 4-8 hours to the pre-print phase.
Incorrect unit scaling: A part designed in millimeters but submitted as inches (or vice versa) will be caught during validation. The file is rejected, you correct the scale, and resubmit. This adds 24 hours.
How to Prepare a File That Passes Validation on First Submission
Design with minimum wall thickness in mind: Check your fabrication partner's material specifications for minimum wall thickness. Design all walls at least 1.0 mm thick (thicker for delicate parts). This single step eliminates the most common rejection reason.
Avoid enclosed cavities: If your design requires internal channels or cavities, add small drainage holes (0.5-1.0 mm diameter) to allow uncured material or powder to escape. These holes can often be hidden in non-critical areas or filled after printing.
Ensure complete, manifold geometry: In your CAD software, run a "check for manifold" or "repair geometry" function before export. This catches floating faces, incomplete shells, and other errors that will fail automated validation.
Use standard file formats: Export your file as STL or STEP format, which are universally supported. Avoid proprietary CAD formats that may not translate correctly.
Verify unit scaling: Before submitting, confirm that your file is in the correct units (millimeters or inches) and that the overall dimensions match your intent. A quick sanity check prevents rejection due to scale errors.
Simplify geometry where possible: Thin walls, complex overhangs, and intricate features all extend print time and increase the likelihood of support-structure complications. A slightly thicker design that prints faster might serve your purpose just as well. Ask your fabrication partner whether geometry simplifications are feasible without compromising function.
Submit a complete, clear file: Avoid back-and-forth clarifications by including a brief note with your submission: "Part is designed for [application]. Material preference is [material]. Tolerances are [tolerance range]. Any design feedback welcome." A clear brief eliminates the need for follow-up emails, which add 24 hours per exchange.
Shipping and Logistics Considerations
Printing time plus post-processing time doesn't equal total turnaround. Shipping adds days.
Local pickup eliminates shipping delay entirely.
How to Optimize Your Order for Faster Delivery
Start with a clear, complete CAD file. If you're working from sketches or photos, get the design finalized before submitting to the fabrication lab. Back-and-forth design revisions add days.
Conclusion
Turnaround time for custom 3D printed parts depends on part geometry, material choice, machine capacity, post-processing requirements, file quality, and shipping logistics. Understanding these variables lets you make smarter decisions about your order.
Frequently Asked Questions
What is the typical turnaround time for custom 3D printed parts?
Turnaround time depends on several factors including part complexity, material choice, post-processing requirements, and current machine capacity. Timelines vary based on your specific design and delivery location, so requesting a quote gives you the most accurate estimate for your project.
How do factors affecting 3D print time impact my delivery date?
Part geometry, layer height, infill density, and support structures all influence actual print duration. Simpler, smaller parts with standard settings print faster than complex designs requiring custom configurations. Additionally, batch processing and nesting multiple parts on the build plate can reduce per-unit time. Your design choices directly affect how quickly your parts move through production and reach you.
What 3D printing post-processing steps add time to my order?
Common post-processing includes support removal, surface finishing, curing, and quality inspection. Depending on material and desired finish, parts may need sanding, vapor smoothing, or hand-finishing. More intensive finishing adds days to your timeline. Discussing your finish requirements upfront helps set realistic expectations and ensures your parts arrive in the condition you need.
Can I get my custom 3D printed parts faster?
Yes. Optimize your CAD file for printing by minimizing support structures, choosing appropriate layer heights, and designing for the build volume. Simpler geometries print faster. Express services are available for rush orders. Batch processing multiple parts together can also improve efficiency. Working closely with your fabricator during file preparation is the best way to balance speed with quality.